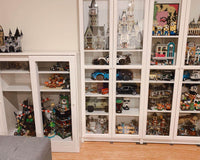

Showing off your tirelessly assembled Lego Christmas themed models will not be enough to attract the attention unless you have given an entirely different vitality with LED lights. Installation of light kits from Lightailing is easy for enthusiasts with or without electrical skill, thanks to the instruction manual.
Lighting and Christmas are almost synonymous as no celebration is complete without the incorporation of glittering lights. So, when a Lego enthusiast gets hold of the Creator Christmas special models like Santa’s Workshop, Winter Village Market and Winter Holiday Train, lighting up these models becomes one of the most interesting and enjoyable tasks. The Christmas lights and decorations look stunning as usual, that being said, your Lego models to require the extra beauty quotient so that they can stand out amid the Christmas decorations. If you think that just because you have a minimal idea about electrics, setting up lights for the Lego sets would be a difficult task, well, you are wrong. Skilled or not, if you follow the installation steps, lights can be set up without any hassle.
Decorating the Christmas Lego Set
Before you light up Lego bricks, the most important task is to know about the special features of the model so that you can add lights strategically and even customize with the light kit. Once you are done assembling the entire Lego structure, start with the lighting kit according to the following steps –

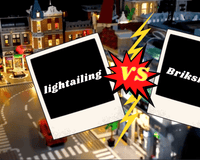
- Open up the original Lightailing or Briksmax box and unfurl the bubble films around each of the plastic packets to reveal the lighting accessories. Keep the lights, wires, expansion boards, power cord, Adhesive Square and random Lego bricks separately. Keep the after-sale warranty card safely as it will come handy in future servicing.
- Start with the instruction manual and the user guide from the Lego night light kit because otherwise, you would not know how to assemble the USB hub, set up the expansion boards, connect the wires through separators and utilize the Adhesive Squares. While the User Guide is for future installations, the instruction book written in the universal language contains illustrated steps of light installation. No matter you know about electrics or not, the instructions will be useful to all.
- Test each accessory to make sure they are working properly and have no damage. If you find otherwise, return within a week to get a replacement. If the Lego LED light kits are perfect, start connecting the USB power cord to the hub, place the brick separators to pass the wires and get the required (and spare) AA batteries for the battery box.
- Some Lego bricks of random color are given with each lighting kit –add them in the existing Lego model for some customization. Now add the LED lights, light strips and string lights where you are instructed on the manual or just add them in a customized way as you like. Pass the connecting wires from the Lego light sets comfortably through or beneath the brick separators so that they do not hang obnoxiously from the model or get tampered.

Precision and customization with the lighting kit of Lightailing will make your Lego models get a new dimension especially when the surroundings are dark. Get your Christmas light kits soon and add them to build a large Christmas-themed structure.